Kids get bored pretty easily during their long holidays, and keeping them happy and entertained can be tough. However it doesn’t have to be; take a look at these 8 DIY projects that your kids will love and will keep them entertained for hours. WARNING: These crafts require parental guidance.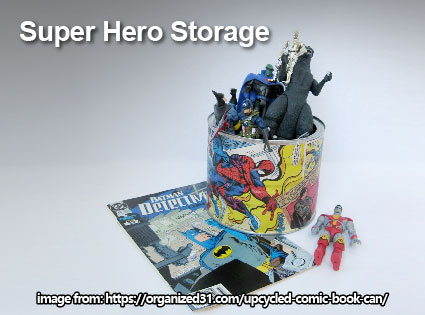
1. Super Hero Storage
Every kid out there loves comic books, and even if they don’t read comic books regularly they still love the artwork with the action packed scenes and the sometimes cartoony characters. However, like most magazines and newspapers, you can’t keep a comic book forever; at the same time you may not be ready to just throw it away. So why not repurpose it and make a cool container for your child’s toys? You could even use it a decoration piece.
You’ll need:
- An empty can or container
- Some old comic books
- A pair of scissors
- Some glue
How to make it:
Step 1: Cut out the comic panels you want to use and plan out how you want to put them on the can. You can lay them on the can to get an idea of what it will look like.
Step 2: Use glue to stick the comic strips onto the can or container. Stick it on carefully to avoid bubbles, so that it is nice and smooth.
Step 3: Leave it to dry for 20 – 30 minutes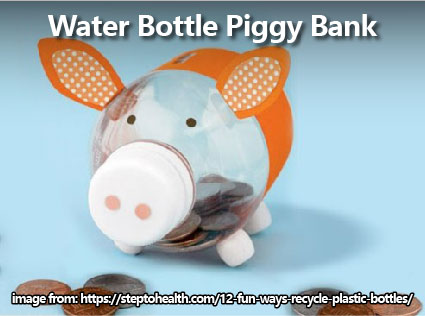
2. Water Bottle Piggy Bank
Teach your child to save money and keep it safe with this cute piggy bank.
You’ll need:
- Empty plastic beverage bottle (the wider the better)
- Crafting knife
- Scissors
- Coloured paper
- A Pencil/Marker
- Some glue
- Transparent tape
- A Paintbrush
- Four big beads
- Glue
- Paint (optional)
How to make it:
Step 1: Peel off the label from your bottle and clean it. Use you crafting knife to cut a 1 1/2″ x 1/8″ wide slot on the bottle for inserting coins. Cut it about midway between the top and bottom.
Step 2: Use your scissors to cut a strip of coloured paper long enough to wrap around the bottle and same width as bottle label. Wrap the paper around the bottle without sticking it and use a pencil to mark where the slot is. Unwrap the paper and cut a slot with your crafting knife. Now you can wrap it back on and stick it to the bottle with tape or glue. Make sure the two slots are aligned
Step 3: Draw a pair of ears on your coloured paper and cut them out. Be sure to cut some extra paper to use as tabs to stick the ears to the bottle. Fold the tabs and then stick the ears to the bottle with tape.
Step 4: Use the bottle cap to trace out a nose and draw two little nostrils inside. Then cut out the nose and stick it onto the bottle cap with glue.
Step 5: Draw two small eyes for your piggy bank, cut them out and stick them to the bottle.
Step 6: Take your large beads and glue them to the “belly” of your piggy bank.
Step 7 (optional): Paint your piggy banks “legs”. You can even draw and paint a pattern on your piggy bank.
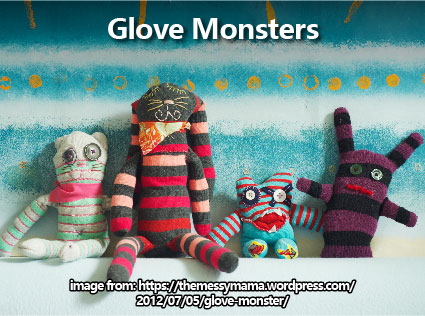
3. Glove Monsters
Have you ever lost one glove from a pair and have no idea what to do with the other one? Why not turn them into an adorable little glove monster? Caution, this project may require adult supervision.
You’ll need:
- Gloves (at least one)
- Batting/Cotton
- Needle and thread
- Buttons, felt, etc for embellishing
How to make it:
Step 1: Turn the glove inside out and sew a U-shape from the top of the thumb hole to the other side of the glove leaving a 1″ hole at the top.
Step 2: Turn the glove right side out.
Step 3: Tuck the cuff inside
Step 4: Stuff the batting/cotton into the glove and make sure to stuff all the fingers as well.
Step 5: Stitch the hole closed
Step 6: Cut out some facial features from some felt (eyes, nose, mouth and teeth) and stitch them onto the glove. You can also stitch buttons in places, for example using buttons for eyes. Now enjoy your little glove monsters.
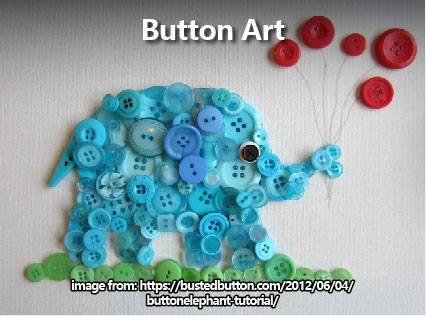
4. Button Art
Introduce you child to the artistic side of life. And if you think this art seems odd, let me ask you this; Who said you could only use brushes, pens and pencils to make art? Remember, there are no rules to art.
You’ll need:
- A canvas
- A paintbrush
- Paint
- Glue
- A lot of buttons, of all shapes and sizes
How to make it:
Step 1: Take your canvas and draw a simple design like a bare tree.
Step 2: Wait for the paint to dry.
Step 3: Take your buttons and glue and start sticking them on the tree placing them where the leaves should be (Stick on as many as you want).
Step 4: Step back and admire the work while you wait for the glue to dry.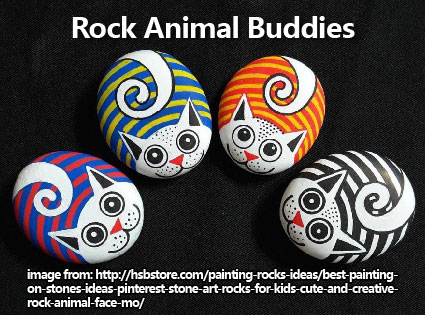
5. Rock Animal Buddies
Show your child how a different perspective can change everything by turning a rock into an animal like a tiger, cheetah or Panda.
You’ll need:
- 2 rocks, one smaller than the other (1 pair for each animal)
- Acrylic paint in assorted colours
- Paintbrushes
- Glue
- Scissors (Optional)
- Construction paper (Optional)
How to make it:
Step 1: Paint both rocks a solid colour and let it dry.
Step 2: Use a smaller brush to paint in the details like the stripes or spots and facial features(on the smaller rock). Let the paint dry
Step 3: Glue the two rocks together
Step 4 (Optional) : Cut a of circles out of your construction paper for ears and glue them onto your animal. Now you can play around with some cute wild animals.
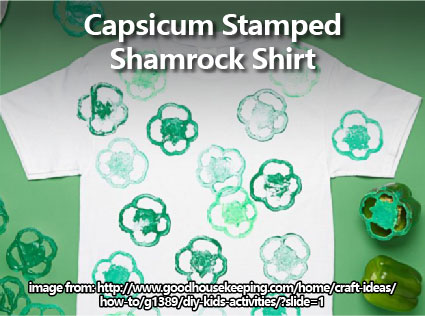
6. Capsicum Stamped Shamrock Shirt
Give your child some of the luck of the Irish with these custom T-shirts
You’ll need:
- A large capsicum
- A White T-Shirt
- Green Fabric paint
How to make it:
Step 1: Cut the top off a large capsicum or bell pepper
Step 2: Dip it in the green fabric paint
Step 3: Stamp the T-shirt as you see fit.
Step 4: Let the paint dry and voila.
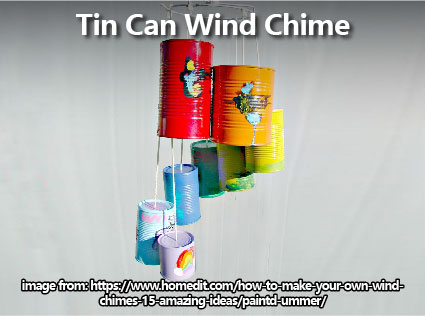
7. Tin Can Wind Chime
Wind chimes are meant to be serene and relaxing, so let your child experience this wonder for themselves. Caution, this project will need adult supervision.
You’ll need:
- 5 or 6 tin cans in different sizes
- Acrylic paint
- Paintbrushes
- Hammer
- Nail
- Twine
- Scissors
- 10″-wide hoop (embroidery hoop)
How to make it:
Step 1: Clean all the cans and remove their labels.
Step 2: Paint the cans a solid colour and leave them to dry.
Step 3: Now paint geometric designs on the cans like squares, circles and triangles.
Step 4: Make a small hole in the bottom of the cans with a hammer and nail. This will be used to hang the cans later on.
Step 5: Put a long piece of twine (vary the lengths of the twine so that they can hang at different heights yet still hit each other when the wind blows) through the hole and tie a knot and the end that goes through the hole so that it doesn’t fall off.
Step 6: Tie the cans to the embroidery hoop, place them around the hoop evenly. Tie one long piece of twine on opposite ends of the hoop so you can hang it.
Step 7: Hang it up near a window or balcony and admire the work.
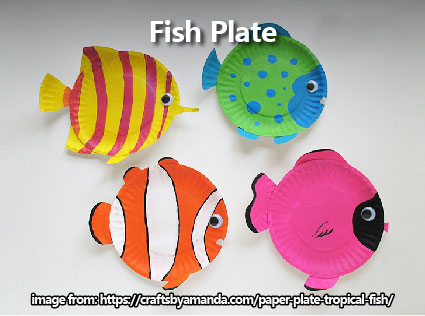
8. Fish Plate
Have fun painting your own school of fish plates.
You’ll need:
- Paper plates (2 for each fish)
- Acrylic paint in assorted colours
- Paintbrushes
- Scissors
- Googly eyes or buttons
- Pencil
- Glue
How to make it:
Step 1: Take one paper plate and paint as the body of the fish. You can paint, stripes or scales or any design you prefer.
Step 2: For the eye you can either paint it on or stick a googly eye or a button on the plate with glue.
Step 3: For the mouth you can either paint it on or cut it out with scissors.
Step 4: On the second plate, draw the two fins and the tail, cut them out and paint them so they match the body.
Step 5: Glue the fins and the tail onto the fish and body and you’re done.
So the next time your little bundle of joy comes up to you and tells you that they are bored, bring out these DIY projects and let the fun times roll. The only limit is your imagination.
Looking for my DIY projects you can do with your family? Talk to us, send us a message at hello@iqiglobal.com or call us at 012-299-6155 or 037-450-6655.
Liked what you read? Check out this article next: 5 Best Indoor Playgrounds For Kids In KL
Be a part of our award-winning team of investors, click here: https://goo.gl/CvPNyQ
